Installing a dash cam is a straightforward DIY project that typically takes 15-30 minutes for a 12V socket setup or 1-2 hours for hardwiring, which provides a cleaner look and enables parking mode. The process involves selecting an optimal mounting position, routing the power cable discreetly along the headliner and A-pillar, and connecting it to either the car’s 12V accessory socket or directly to the fuse box using a hardwire kit.
Before You Begin: Tools and Preparation
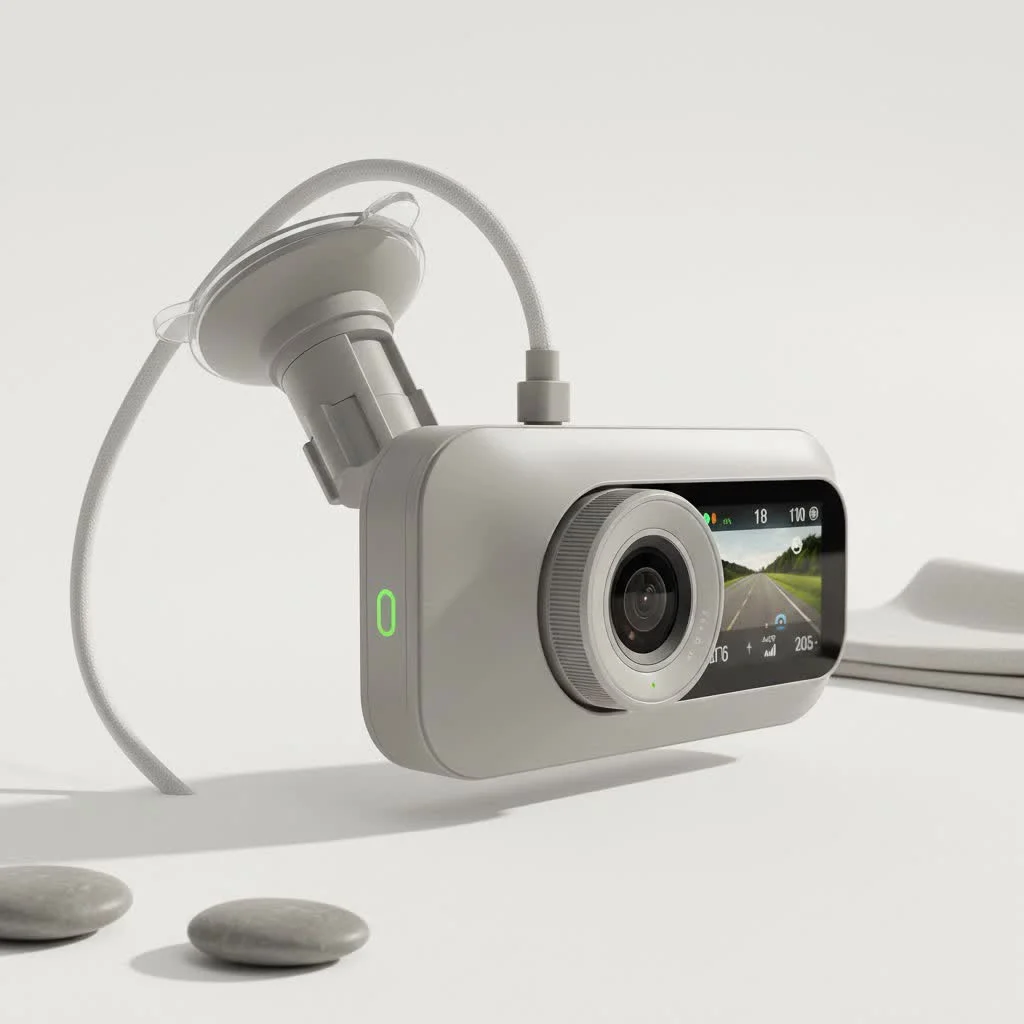
A successful installation starts with having the right tools on hand. A little preparation goes a long way in making the process smooth and frustration-free. For expert automotive dash reviews on this site.
Essential Tools:
- Your dash cam and its included accessories (power cable, mount)
- A plastic trim removal tool (highly recommended to avoid scratching your car’s interior)
- Zip ties or cable clips for wire management
- A clean microfiber cloth
For Hardwiring (Advanced Method):
- A dash cam hardwire kit (specific to your camera’s power needs)
- A circuit tester or multimeter
- Fuse puller (often found in your car’s fuse box)
- Add-a-Fuse or fuse tap kit (ensure you get the right size for your vehicle: ATO, Mini, Low-Profile Mini, or Micro2)
- Pliers or a wire crimping tool
Before you mount anything, plug your dash cam into a power source (like your car’s 12V socket) to make sure it powers on, records, and functions correctly. It’s much easier to troubleshoot a faulty unit on your workbench than when it’s already installed.
Step 1: Finding the Perfect Dash Cam Position
Where you place your dash cam is critical for both performance and safety. The goal is to capture the best possible view of the road without obstructing your line of sight.
The ideal spot is typically on the passenger side of the rearview mirror. This placement hides the camera from the driver’s view, keeping your focus on the road, while still allowing the lens to see clearly through the area swept by the windshield wipers.
How to Position Your Dash Cam:
- Sit in your normal driving position and hold the dash cam in various spots behind the rearview mirror.
- Power the camera on and check the live view on its screen or via its smartphone app to confirm it has a clear, unobstructed view of the road ahead.
- Ensure the placement doesn’t interfere with any sun visors or onboard safety sensors (often housed near the mirror).
- Once you’ve found the perfect spot, clean the windshield area thoroughly with a microfiber cloth to ensure the adhesive mount sticks securely.
- Attach the mount firmly to the glass.
Step 2: Routing the Power Cable
The secret to a clean installation is hiding the wire. This process is surprisingly simple and usually requires no tools other than your fingers and a trim tool.
- Across the Headliner: Start by tucking the power cable into the gap between the top of your windshield and the headliner. Gently push the cable in, working your way from the camera mount towards the passenger-side A-pillar (the pillar running alongside the windshield).
- Down the A-Pillar: When you reach the A-pillar, use a plastic trim tool to gently pry open the edge of the pillar cover. You don’t need to remove it completely. Tuck the cable inside, running it alongside any existing wiring.
Safety Warning: The A-pillar often contains an airbag. Always route the dash cam cable behind or alongside the airbag, never in front of it. In the event of a deployment, a wire in front of the airbag could become a dangerous projectile.
- Under the Dashboard: Continue routing the cable down the side of the dashboard (often hidden by the weather stripping on the door frame) until you reach the passenger-side footwell. From here, you can run it behind the glove box towards your power source.
Choosing Your Power Source: Two Main Methods
You have two primary options for powering your dash cam. The choice depends on your technical comfort level and whether you need features like parking mode.
Method 1: The Simple 12V Socket (Cigarette Lighter)
|
Our Picks for the Best Dash Cam in 2026
As an Amazon Associate I earn from qualifying purchases.
|
||
| Num | Product | Action |
|---|---|---|
| 1 | ROVE R2-4K DUAL Dash Cam Front and Rear, STARVIS 2 Sensor, FREE 128GB Card Included, 5G WiFi - up to 20MB/s Fastest Download Speed with App, 4K 2160P/FHD Dash Camera for Cars, 3\" IPS, 24H Parking Mode |

|
| 2 | REDTIGER 4K Dash Cam Front Rear, STARVIS 2 Sensor, Free Card Included, 5.8GHz WiFi-20MB/s Fast Download, Dash Camera for Cars with GPS, WDR Night Vision, 170°Wide Angle, 24H Parking Mode(F7NP) |
|
| 3 | Navycrest 4K Dash Cam Front and Rear with 64GB Card, Built-in 5G WiFi, Dash Camera for Cars 4K Front and 1080P Rear, Dashcams for Cars Loop Recording, Gravity Sensor, 24-Hours Parking Mode |
|
| 4 | Dash Cam Front and Rear, 2.5K+1080P Dual Dash Camera for Cars, 2’’ Display Mini Car Camera, G-Sensor Dashcam, Night Vision, 24H Parking Mode, Loop Recording, 170°Wide Angle, 32GB Card Included |
|
| 5 | Dash Cam Front and Rear, 1080P Dash Camera for Cars, 3 Channel Car Camera Front Rear and Inside with 32GB Card, Loop Recording, Night Vision, HDR, 24Hr Parking, G-Sensor |
|
| 6 | 4K Dash Cam Front, Built-in 5G WiFi, 64GB Card Included, Dash Camera for Cars, Mini Dashcam with Super Night Vision, Loop Recording, G-Sensor, 24 Hours Parking Monitor, Support 256GB Max |
|
| 7 | Dash Cam 1296P Front Dashcam, V300 WiFi Dash Camera for Cars with App, Night Vision, Mini Hidden Single Car Camera, Loop Recording, 24H Parking Mode, Support 256GB Max, Black |
|
| 8 | VIOFO A229 Plus Dash Cam Front and Rear, Dual STARVIS 2 Sensors, 2 Channel HDR, 1440P+1440P Voice Control Car Dash Camera, 5GHz Wi-Fi, Voice Control, Ultra-Precise GPS (SD Card Not Included) |
|
| 9 | REDTIGER 4K STARVIS 2 Dash Cam Front and Rear, 5GHz WiFi 20MB/s Download, 128GB Card Included, Voice Control, Dash Camera for Cars with 3.18\" Touch Screen, GPS, Loop Recording, Parking Mode(F7N Touch) |
|
| 10 | IIWEY N5 4 Channel Dash Cam 360° View, 1080P Front and Rear Inside, Left Right Dash Camera for Cars, 8 IR Lamps Night Vision, 5G WiFi & APP Control, G-Sensor, Parking Mode, with a Free 128GB SD Card |
|
This is the easiest and most common method, perfect for beginners.
- Pros: Extremely simple, requires no electrical knowledge, and is completely reversible.
- Cons: Wires may still be visible near the socket, it occupies your 12V outlet, and the camera will only have power when the car is on.
Installation Steps:
- After routing the cable to the footwell, simply run it to your car’s 12V accessory socket.
- Plug in the adapter.
- Use zip ties to bundle any excess cable and tuck it away neatly under the dashboard or behind the glove box to prevent it from dangling.
Method 2: Hardwiring for a Professional Finish
Hardwiring connects the dash cam directly to your car’s fuse box. This is the cleanest method and is necessary to enable parking mode, which allows the camera to record incidents even when the car is off.
- Pros: Frees up your 12V socket, provides a completely hidden and permanent installation, and enables parking mode.
- Cons: Requires basic knowledge of your car’s electrical system.
Installation Steps:
- Locate the Fuse Box: Your car’s manual will show you where the interior fuse box is located. It’s often under the dashboard on the driver’s side or behind the glove box.
- Find the Right Fuses: A hardwire kit has two power wires: one for constant power (ACC+) and one for switched power (IGN+).
- Switched Fuse: This fuse only has power when you turn the ignition on. Use your circuit tester or multimeter to find a fuse that powers non-critical components like the radio or 12V socket.
- Constant Fuse: This fuse always has power, even when the car is off. This is needed for parking mode. Look for fuses connected to things like hazard lights or interior dome lights.
- Connect the Fuse Taps: Remove your chosen fuse with a fuse puller. Insert it into the empty slot on your fuse tap. Then, insert the new fuse that came with the tap kit into the second slot. Finally, plug the entire fuse tap into the original fuse slot.
- Connect the Ground Wire: The third wire on the hardwire kit is the ground wire (usually a black C-shaped connector). Find an unpainted metal bolt or screw connected to the car’s chassis near the fuse box and secure the ground wire underneath it. A solid ground connection is crucial for the camera to function.
- Connect and Tidy Up: Plug the hardwire kit’s main cable into your dash cam, bundle any excess wiring with zip ties, and secure it safely out of sight.
Final Touches and Testing
Once everything is connected, it’s time for the final check.
- Turn on your car’s ignition. The dash cam should power on automatically.
- Check the camera’s view to ensure it’s still aimed correctly.
- Go into the camera’s settings and format the SD card.
- Configure essential settings like loop recording, G-sensor sensitivity, and resolution.
- If you hardwired for parking mode, turn the car off and check if the camera enters parking mode as expected.
Frequently Asked Questions (FAQ)
Is it hard to install a dash cam?
No, for most people, installing a dash cam using the 12V socket is a very easy 15-30 minute job that only involves tucking one cable into your car’s trim. Hardwiring is more involved but is a manageable project for a confident DIYer.
How much does it cost to have a dash cam professionally installed?
Professional installation costs typically range from $50 to $150, depending on the complexity of the vehicle and the type of dash cam (e.g., front-only vs. front-and-rear).
Does hardwiring a dash cam drain the car battery?
Modern hardwire kits have a built-in voltage cutoff feature. This automatically shuts the camera off if your car’s battery voltage drops to a preset level, preventing it from draining the battery and leaving you stranded.
Where is the best place to mount a dash cam?
The best place is high up in the center of the windshield, typically behind the rearview mirror. This provides a clear view of the road without distracting the driver or obstructing their vision.
Can installing a dash cam void my car’s warranty?
If installed correctly, no. Using fuse taps for hardwiring is a non-invasive method that doesn’t alter the car’s original wiring, so it should not affect your vehicle’s warranty.
Drive with Confidence
Congratulations! By following these steps, you’ve completed the process of installing a dash cam, securing a silent witness for every drive. A clean, reliable installation not only enhances the look of your car’s interior but also provides peace of mind knowing your journey is protected. Now, drive safely and enjoy the confidence that comes with having an extra set of eyes on the road.
Frequently Asked Questions
Is it difficult to install a dash cam yourself?
No, installing a dash cam using the 12V socket is an easy 15-30 minute task for most people, involving only tucking a single cable. Hardwiring is more complex but manageable for a confident DIYer, typically taking 1-2 hours.
What is the typical cost for professional dash cam installation?
Professional dash cam installation usually costs between $50 and $150. The price varies based on the vehicle's complexity and whether it's a front-only or front-and-rear dash cam system.
Will hardwiring a dash cam drain my car's battery?
Modern hardwire kits include a built-in voltage cutoff feature. This safety mechanism automatically powers off the dash cam if your car's battery voltage drops below a preset level, preventing battery drain.
What is the best location to mount a dash cam in a car?
The optimal mounting location for a dash cam is high up in the center of the windshield, typically positioned behind the rearview mirror. This placement ensures a clear view of the road without obstructing the driver's vision.
Does installing a dash cam affect my car's warranty?
No, if installed correctly, a dash cam should not void your car's warranty. Hardwiring methods that use fuse taps are non-invasive and do not alter the vehicle's original electrical wiring.
How to Install a Dash Cam
This guide provides step-by-step instructions for installing a dash cam, covering both the simple 12V socket method and the advanced hardwiring technique for a clean, professional finish and parking mode functionality.
Find the ideal spot for your dash cam, typically on the passenger side of the rearview mirror, ensuring it has a clear view of the road without obstructing your line of sight. Clean the windshield area thoroughly before attaching the mount firmly to the glass.
Discreetly tuck the power cable into the gap between the windshield and headliner, then down the A-pillar (behind any airbags for safety), and finally under the dashboard towards your chosen power source. Use a plastic trim tool to gently pry open trim edges.
Choose between the 12V socket for a simple setup or hardwiring to the fuse box for a permanent, hidden installation with parking mode. For hardwiring, locate constant and switched fuses, connect fuse taps, and secure the ground wire to an unpainted metal bolt.
Bundle any excess cable with zip ties and secure it neatly out of sight under the dashboard or behind the glove box. This prevents wires from dangling and ensures a professional, factory-finish look.
Turn on your car to ensure the dash cam powers on automatically and is aimed correctly. Format the SD card and configure essential settings like loop recording, G-sensor sensitivity, and resolution. If hardwired, verify parking mode functionality when the car is off.
Get our weekly buyer guide
Practical specs, not advice. Unsubscribe anytime.
I was really nervous about hardwiring my new Viofo A129 Pro Duo, but the guide made it super clear. The tip about using a plastic trim removal tool was a lifesaver – no scratches at all! It took me about an hour and a half, but now it looks totally professional and I have parking mode working perfectly.
Fantastic guide! I’d been putting off installing my Garmin Dash Cam 57 because I thought it would be too complicated. The step-by-step for mounting and cable management made it a breeze. I used zip ties to keep everything neat, and it looks like it was professionally installed. Highly recommend following these tips.
I tried to follow the hardwiring steps for my Rexing V1P, but I had some trouble finding a good fuse to tap into. The instructions were good for the general process, but my car’s fuse box layout was a bit confusing. I ended up just using the 12V socket for now, which works, but I really wanted that clean look and parking mode.
This was so helpful for getting my BlackVue DR900X installed. I opted for the 12V socket setup since I’m not super handy, and it really did only take about 20 minutes. Routing the cable along the headliner was easier than I thought. My only minor gripe is that I wish there was a bit more detail on specific fuse box locations for different car models, but I figured it out.